
What you need before installing WordPress
The first step toward creating your own WordPress site is buying a domain name with a good hosting company. Start by looking for hosting companies that support WordPress CMS and come with cPanel site management. There are a variety of different options available and each offers different packages and features to consider. If you’re not sure where to start, GoDaddy and BlueHost are both well-respected options.
If you didn’t already know, cPanel is one of the most popular Linux-based interfaces for web hosting services. It allows users to easily manage a variety of services in a single place, without hassle. Luckily, cPanel is well known by most web developers and is considered an industry standard.
Step-by-step guide on how to install WordPress on cPanel
Depending on where you are hosting your website, the steps outlined below may be slightly different. However, the majority of hosting dashboards are quite similar and differ only in where the cPanel interface is located on your dashboard. For the purposes of this tutorial, we will stick with the GoDaddy dashboard, which is one of the more popular options available. Follow the steps below on how to install WordPress on cPanel.
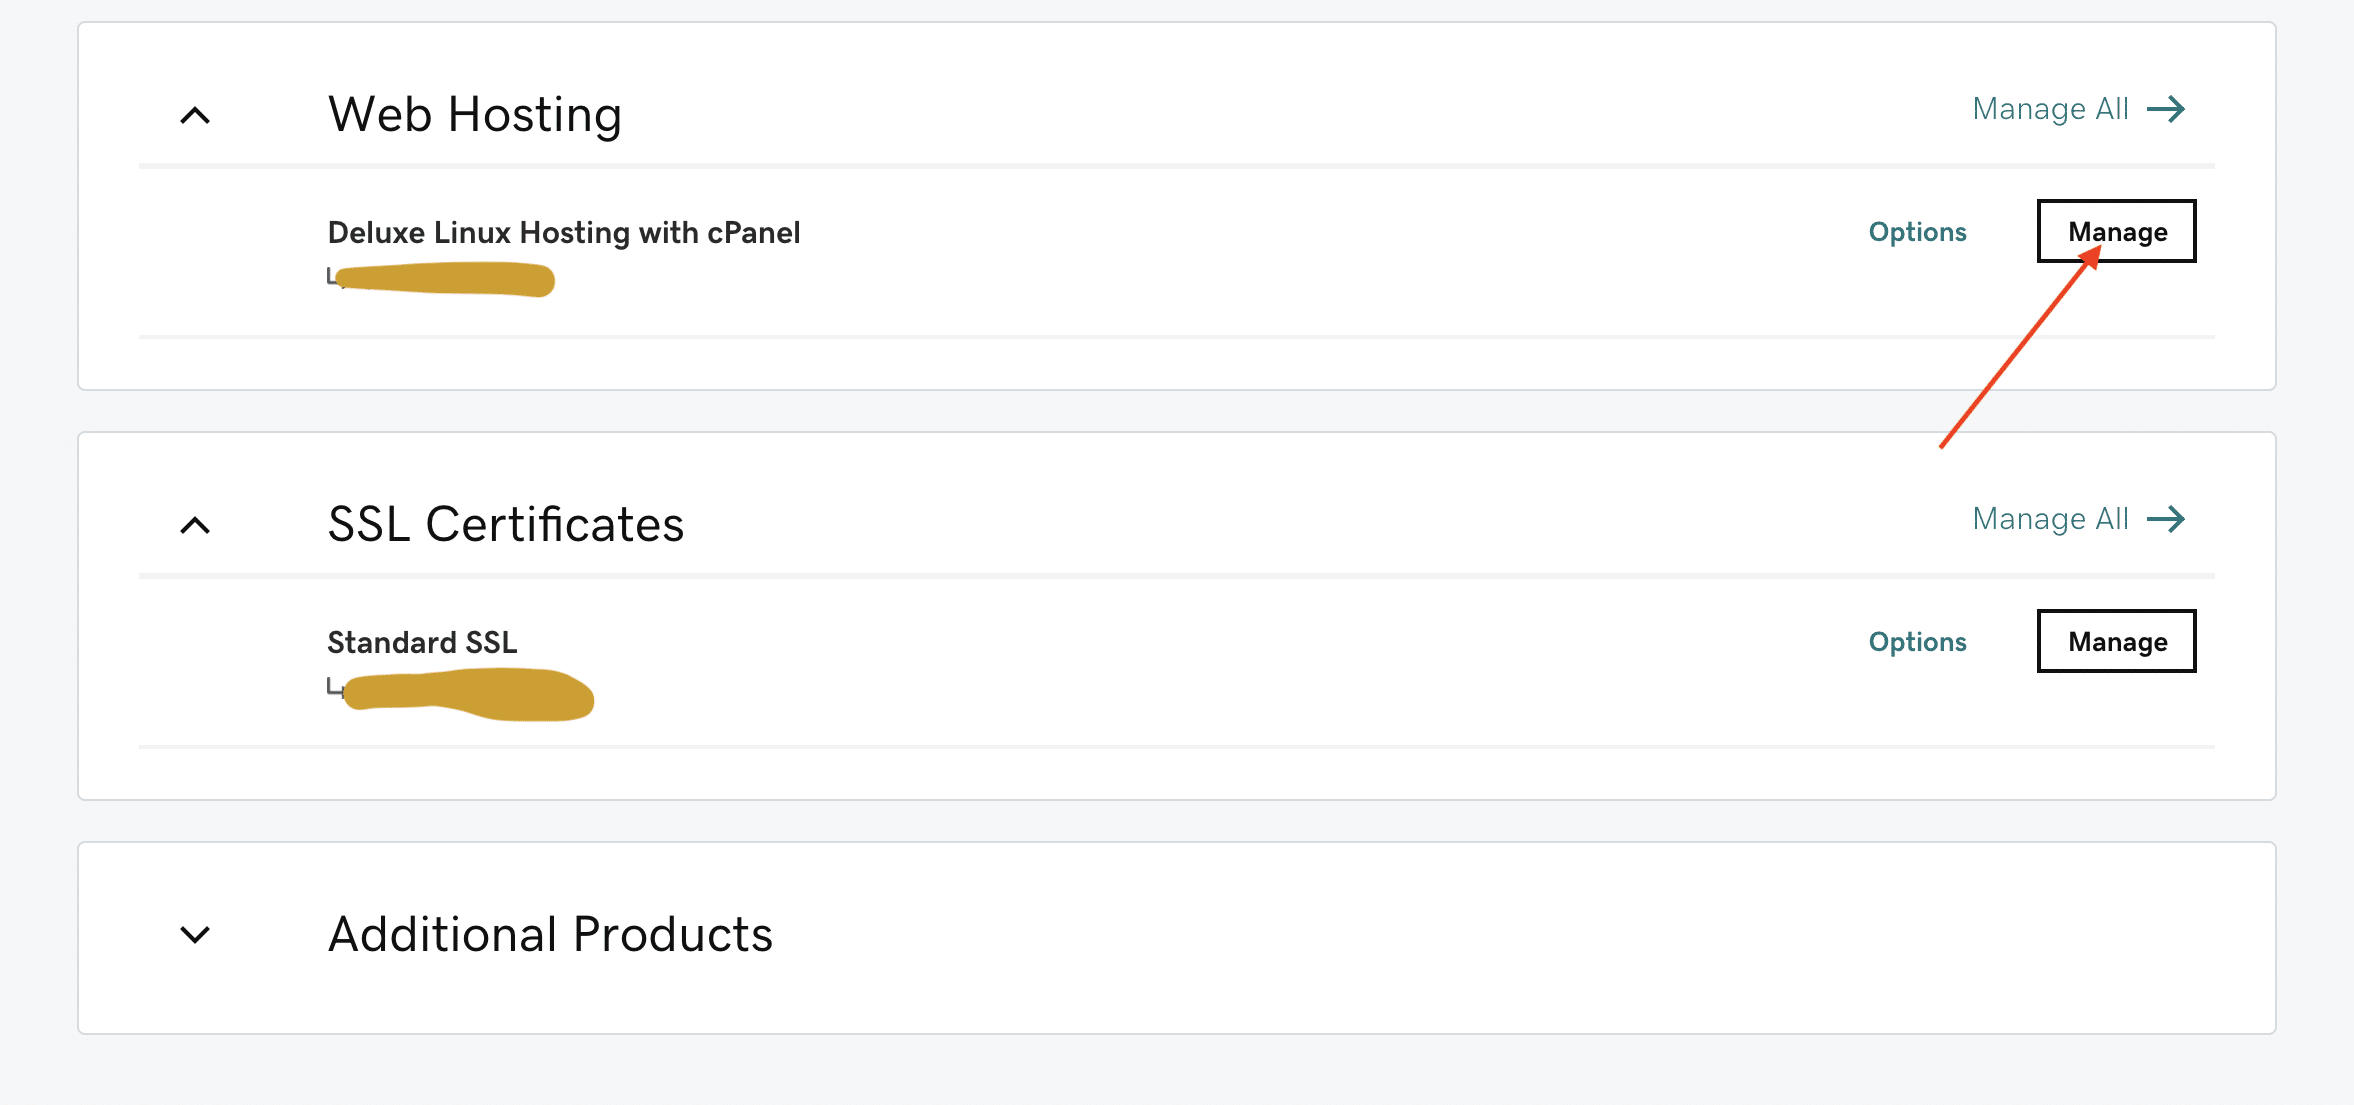
- First, login to your GoDaddy account, click “my products”, find the section “web hosting”. See the image below for details.
- Find the ‘manage’ button and click it. Then click ‘cPanel admin’.
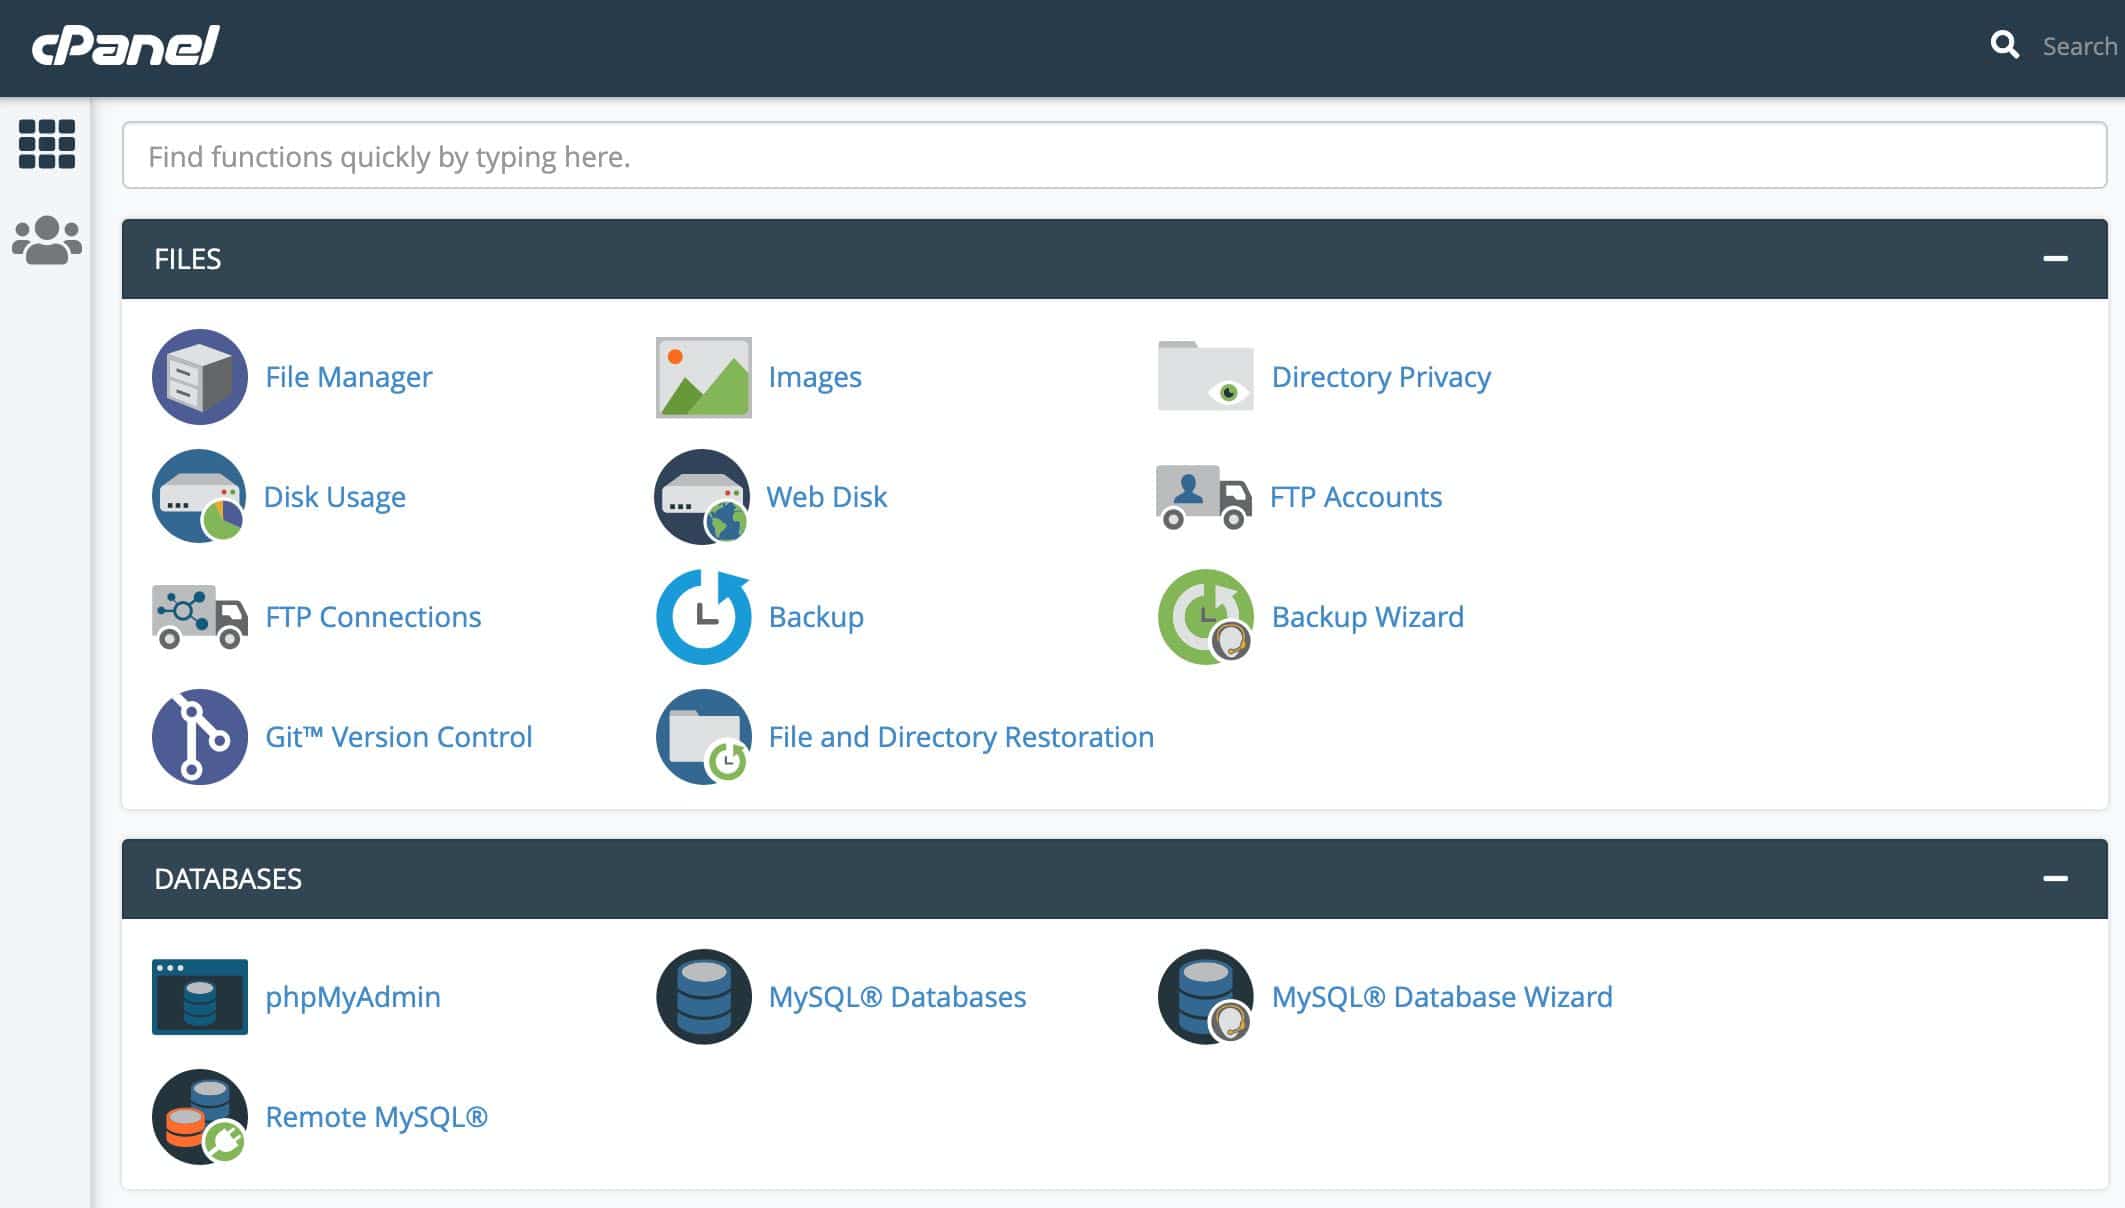
Depending on what hosting service you are using, you might see other features available and a different path to access the cPanel, but when you access the cPanel, it will always look the same. See the image below.
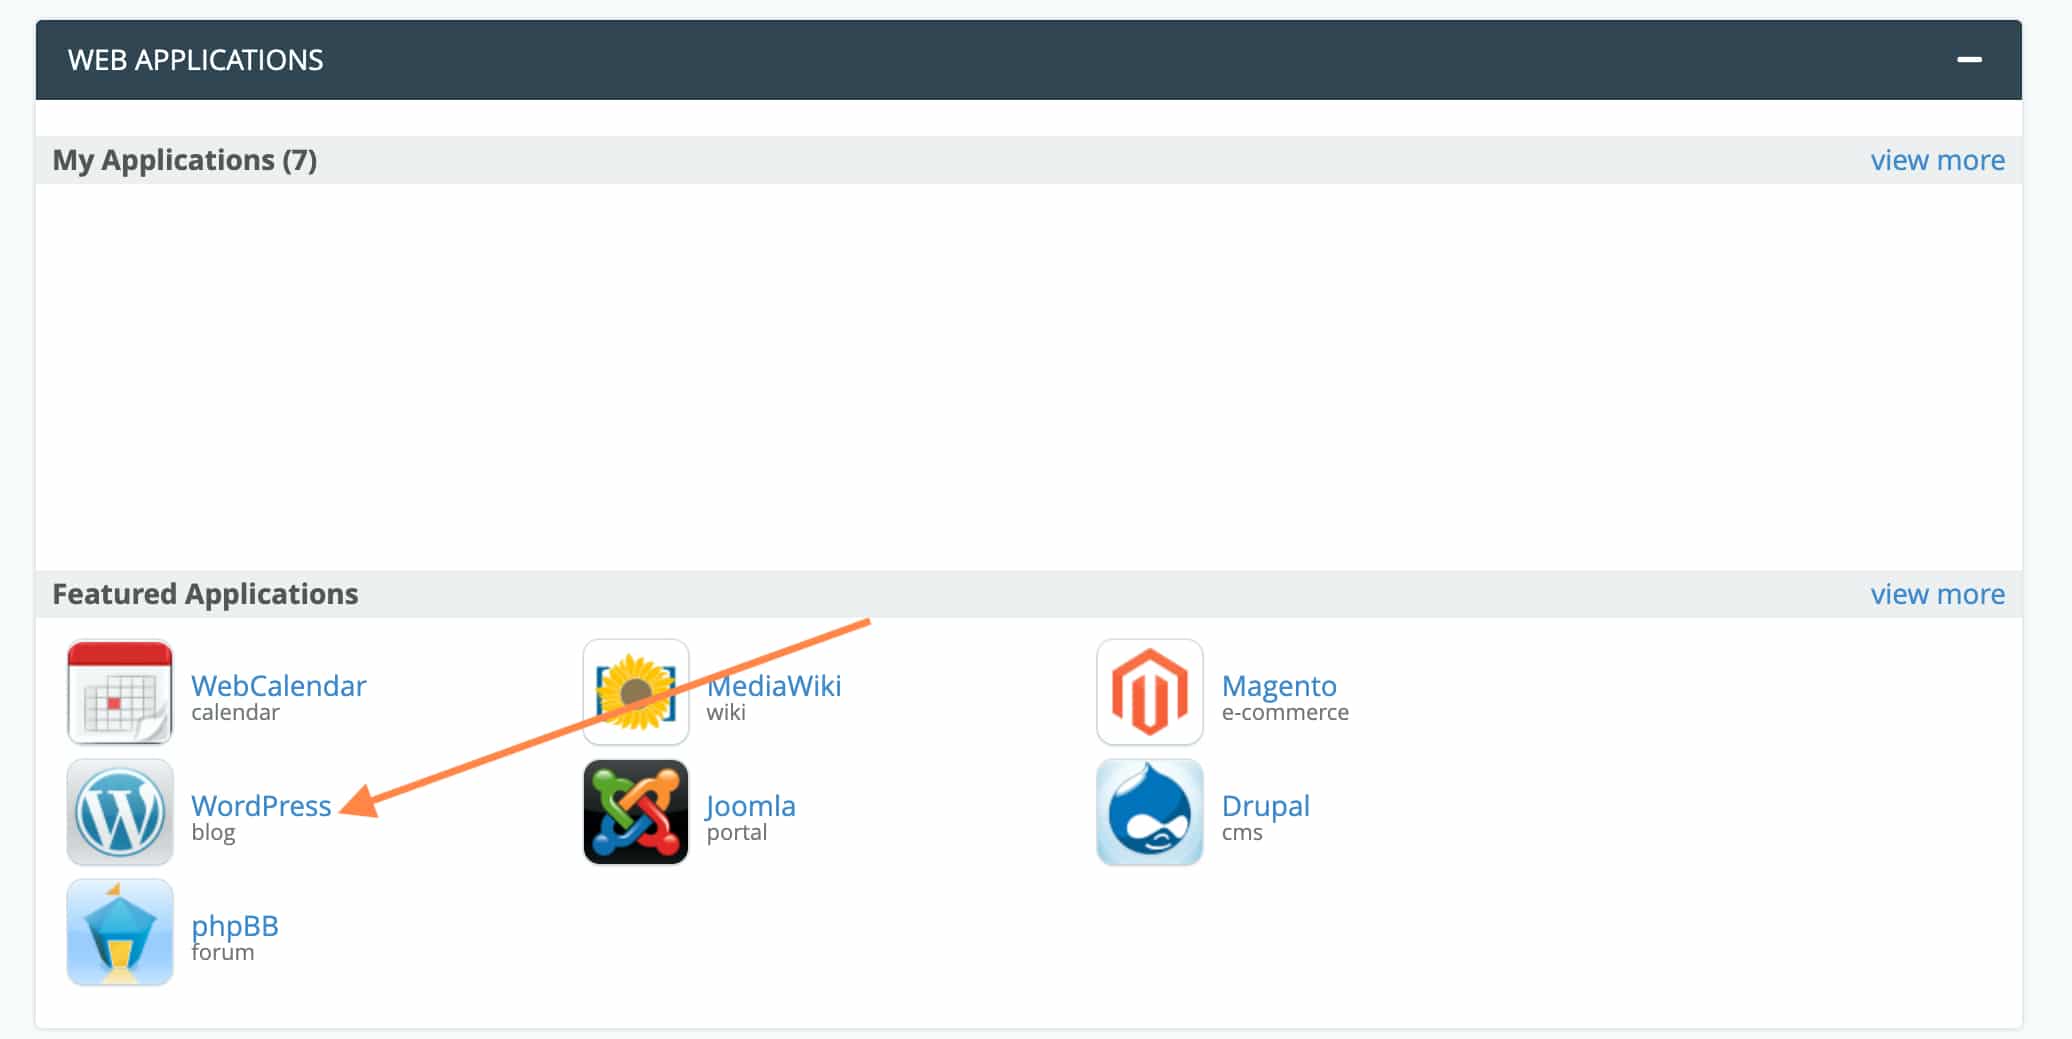
- Locate the web applications section. This is usually where your cPanel interface will allow you to install different apps and software and can include a range of different tools including blogs, portals, various CMSs (or content management systems), and forums. Find the ‘WordPress’ Icon and click it. See the image below.
- After WordPress has been selected, you will be taken to a new page titled Installatron. There, find the button labeled “install this application” and choose the correct domain name. (note: in the dropdown menu, you may see a range of different options for your domain name starting with http, https, or www. Our recommendation is to choose the format starting from http without www, such as http://yourdomainname.com.
- Now you will see four different sections, each asking for different pieces of information. In the first section, labeled “install” you will see fields that read “the name of your domain and “the directory”. The section labeled “the name of your domain” should match the name you chose in the previous step. The directory field should be left empty. In some cases, the Installation interface will add a folder named “blog” in this field. If so, clear this information before moving on to the next step.
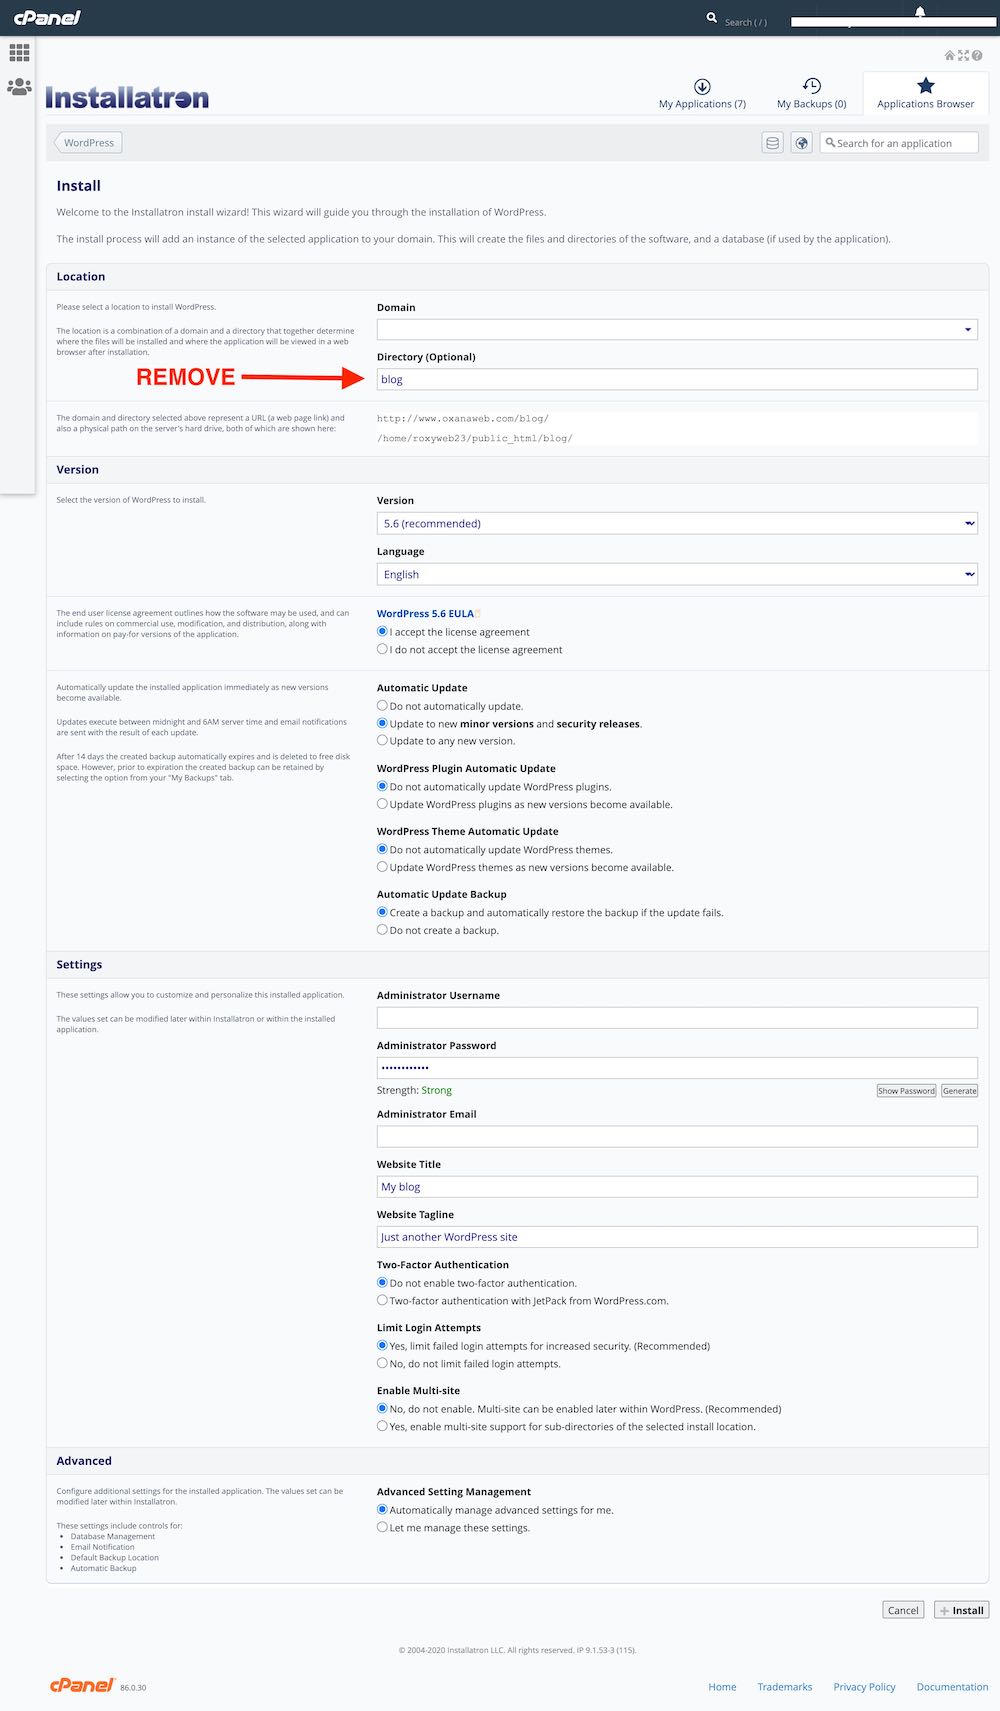
- This section is labeled “version” and includes a variety of different default settings. These settings are for advanced users, so you should keep them as they are for now.
- The third section is labeled “settings”. Here, you will need to create an administrative password and an administrative username. Remember, when choosing your password it is always safest to choose a combination of numbers, letters, and symbols in order to maximize security. Avoid using a password that will be easily guessed such as ‘admin’ or ‘login’. Once you have thought of an appropriate password, be sure to write it down and save it in a safe place, as you will need it later when logging in to your freshly created website.
- In the fourth section, it is time to create a title and description for your new WordPress site. If you haven’t already thought of these, don’t worry, as this information can be easily changed after the installation is complete. The other piece of information you must provide is a valid email address in the field labeled ‘admin email’. When entering the email address, make sure it is accurate and complete, as this is how WordPress will send important information such as notifications, updates, and password reset links if you ever forget your information.
- Once all of your information has been accurately filled in, simply click the install button and let the installer program do its work. In just a few minutes, you will have WordPress fully installed and ready to go. The steps on how to install WordPress on cPanel are complete. Howdy!
Why WordPress is so popular
Aside from being simple to use and install, there are a variety of reasons why so many web publishers are using WordPress today. For one thing, it is a very powerful design tool, allowing you to change the appearance of your website in just a few clicks or heavily customize it to match the unique look and feel you are going for. This makes it a great choice for a variety of industries and purposes.
The other major advantage of WordPress is that it is adaptable. Using different plugins, you can incorporate features like social media feeds, contact forms, pop-ups, chat, eCommerce, and more. Developers are always coming up with new plugins, letting you customize your experience as you go.
Get started on your custom site with CH Web Agency
Do you still have questions or concerns about getting started or how to install WordPress on cPanel? CH Web Agency has over five years of experience creating professional, functional, and attractive websites for clients in a variety of industries. Get in touch with our support team today and we will be happy to help you in any way we can.