Resizing an image in Windows is easy; you don’t need to buy or download any software. Open the windows photos app to get started.
Steps to resize the image
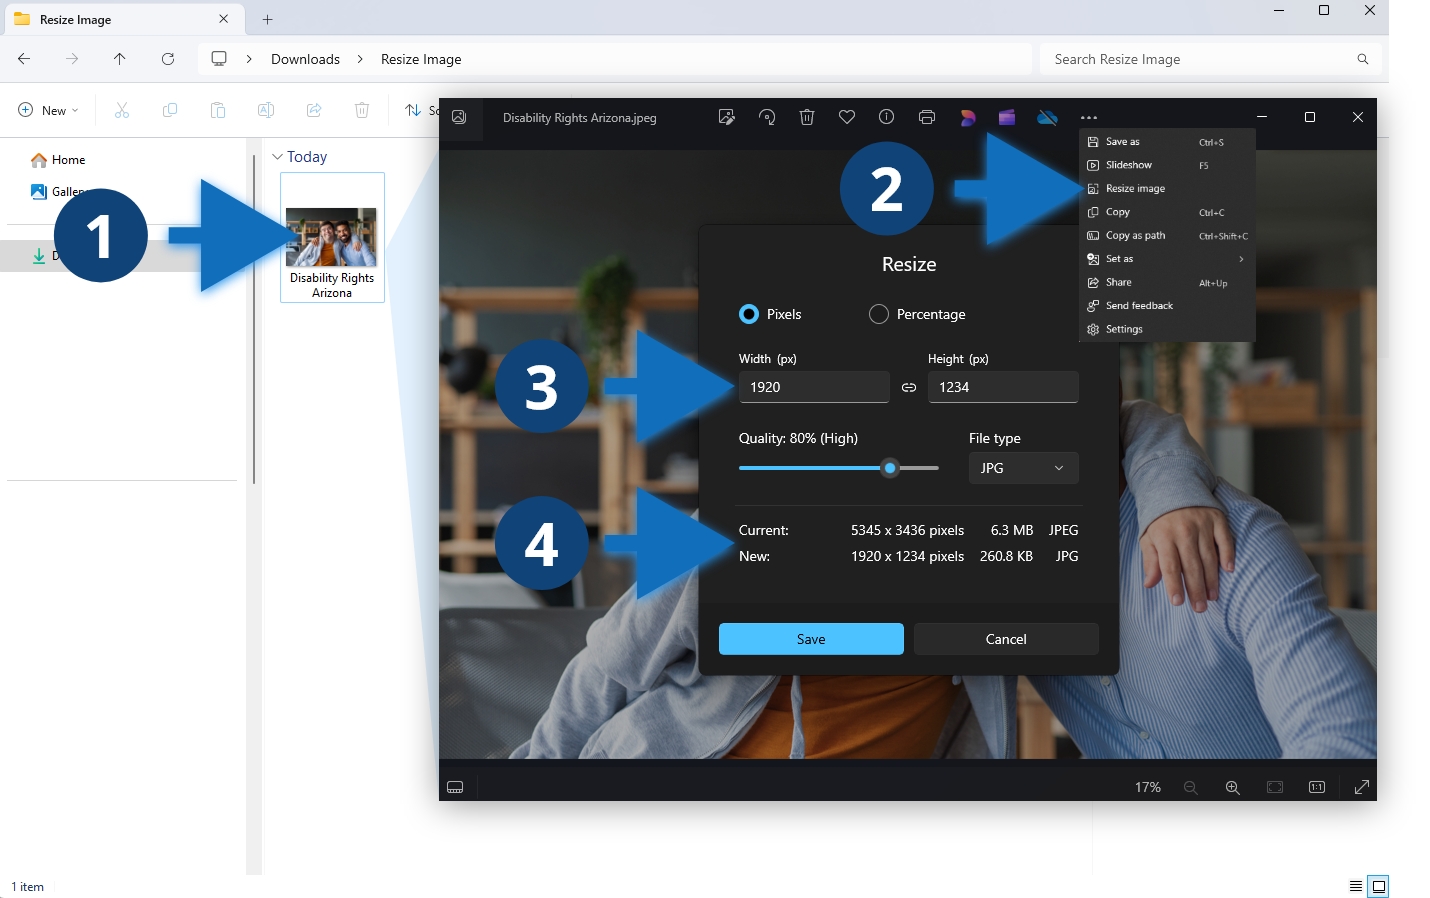
- In Windows, double click the photo, the photo will open in the Windows “Photos” app by default.
- Click the three “See more” dots “…” in the top right and then click “Resize Image”.
- Adjust the width to 1080px-1920px for the longest edge and the quality to 60% – 80%.
- Select file type JPG. Adjust these settings as needed to get the “New” file size to be less than 300KB and click “Save”.
Other considerations
Use a longer width for banner and featured images and a shorter width for posts. If your file type is not set to JPG, such as PNG, change the file type so that the image can be compressed further. In the example above, the image file size went from 6.3MB to 260.8KB, a significant optimization. This will result in a much faster load time without any perceived loss in quality. It is important to optimize images ahead of uploading them to your website. Use these guidelines when using media in new posts and setting featured images.